
Map Your Drum Pads in Beat Studio: MIDI Mapping Guide
Map every pad of your electronic drum kit in Beat Studio with the Mapping Wizard or by hand, including rim zones and the hi-hat pedal, then test each pad.
This is the pad mapping guide for the first setup tutorial.
Every drum module sends a MIDI note number for each pad, and different brands use different numbers. Mapping tells Beat Studio which note belongs to which drum, so a snare hit plays a snare and is scored as a snare.
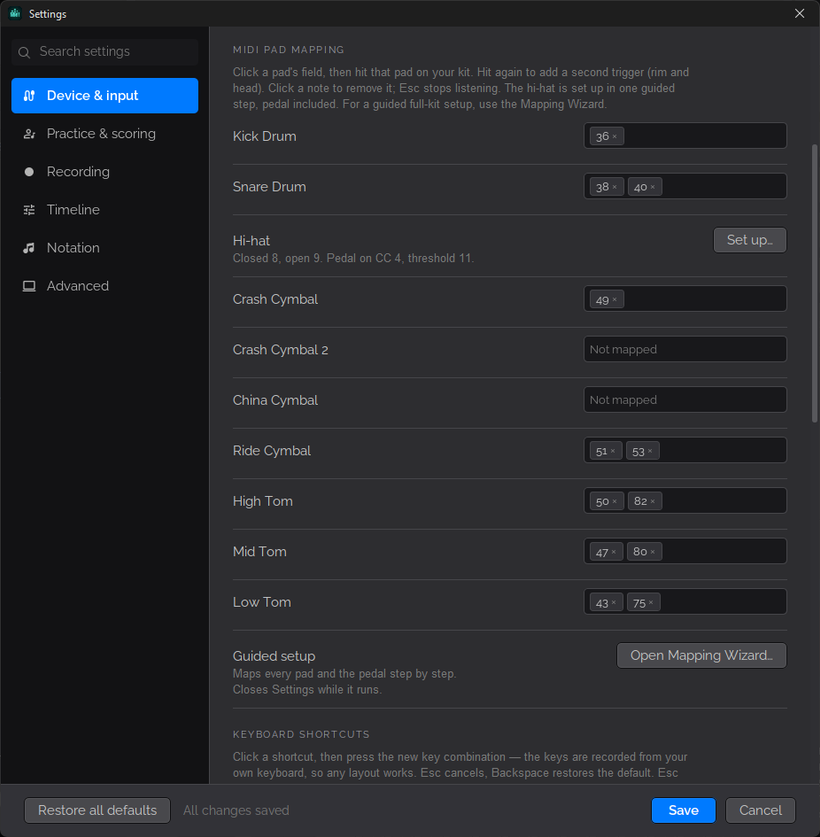
The mapping is in Settings → Device & input → MIDI Pad Mapping. There are two ways to set it up.
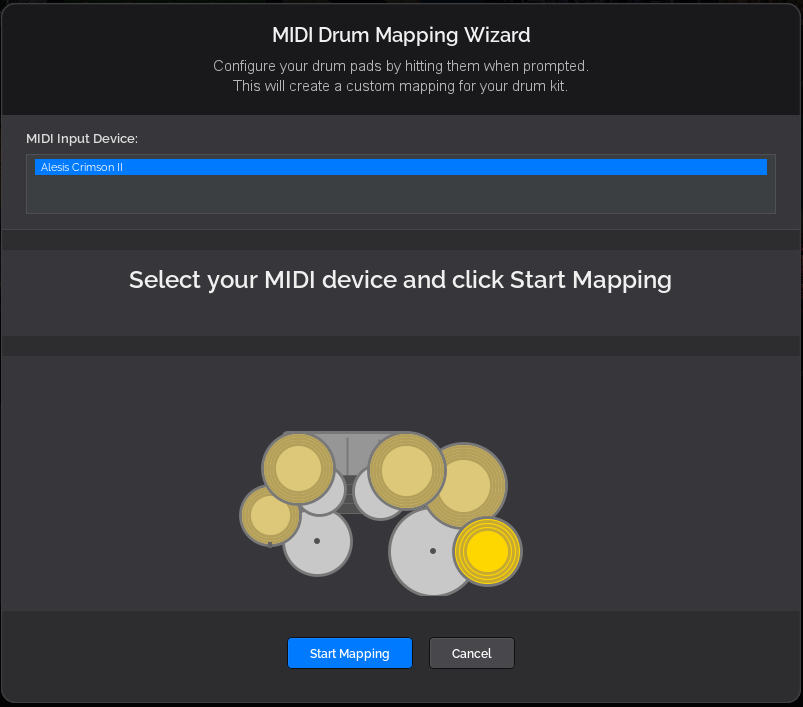
The Mapping Wizard (recommended the first time)
Click Open Mapping Wizard. It goes through the kit one drum at a time: hit the pad when it asks, and Beat Studio captures the note automatically.
- Hit each pad in every way you play it. Many pads send different notes for different zones, like the head and rim of the snare, or the bow and bell of the ride. Hit the snare head, then a rim shot, and both are mapped to the snare. If you skip a zone, that zone stays silent later.
- The hi-hat pedal is detected too. The wizard finds the MIDI CC your hi-hat pedal sends and calibrates the open and closed point, so open and closed hi-hat sounds follow your foot.
Editing single pads
To fix one pad without running the whole wizard, click that pad’s field in the MIDI Pad Mapping list and hit the pad on your kit. Hit it again to add a second trigger, such as rim and head. The hi-hat, including the pedal, has its own Set up button that walks you through it in one step.
Your mapping is saved per device, so if you switch between kits you won’t need to map them again.
Quick test: close Settings and play every pad, including rims and cymbal edges. If a pad is silent, it isn’t mapped. If it plays the wrong sound, it’s mapped to the wrong drum. Either way, fix that pad in MIDI Pad Mapping.
Next step
Your pads are mapped. Go back to the first setup tutorial and pick your audio output device.