
Tutorial
Windows Audio Output Modes in Beat Studio Explained
Choose the right Windows output mode in Beat Studio: Auto, Exclusive, Shared or Exclusive while training, and fix other apps going silent while you practise.
This is the output mode guide for the first setup tutorial.
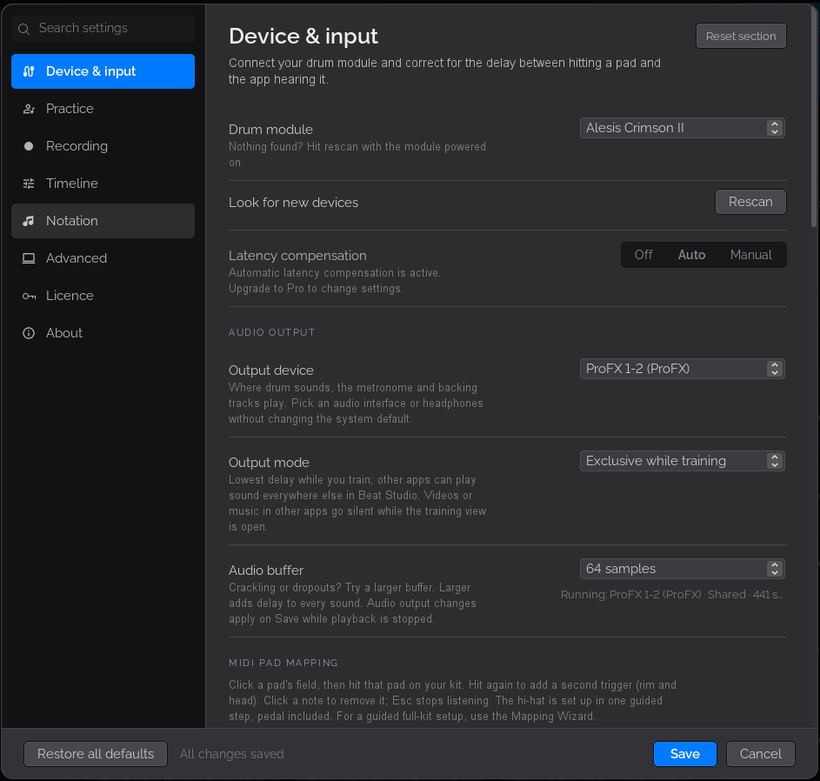
On Windows, Beat Studio can either take the audio device for itself or share it with other apps. Sharing is more convenient but adds latency, because Windows mixes all apps’ sound together before it reaches your ears. Output mode lets you choose:
- Auto (recommended): uses Exclusive mode when it can, and Shared if Windows doesn’t allow it.
- Exclusive: Beat Studio has full control of the device, for the lowest latency. Other apps can’t play sound on that device while Beat Studio is open.
- Shared: other apps can play sound alongside Beat Studio, but latency is noticeably higher.
- Exclusive while training: Shared while you browse the library, Exclusive while the training view is open.
Which one should you pick?
- Start with Auto. Most people never need to change it.
- If YouTube, Spotify or system sounds go silent while Beat Studio is open, that’s Exclusive mode at work (Auto usually ends up in Exclusive). If you only need other audio between sessions, switch to Exclusive while training.
- If you need another app to play while you train, like a video lesson or a call, choose Shared and accept the extra latency.
- If you have two outputs, such as an audio interface and your computer speakers, you can keep Exclusive. It only locks the device Beat Studio uses, so other apps can play through the other one.
On macOS there’s no output mode to pick: Beat Studio uses Core Audio, and you only need to set the device and buffer.
Next step
Your output mode is set. Go back to the first setup tutorial and set the audio buffer.