Use Drum Module Sounds in Beat Studio: Wiring Guide
Connect your electronic drum kit to hear your module's own sounds while you train in Beat Studio, with or without an audio interface: every cable explained.
This is the wiring guide for the first setup tutorial, for when you want to hear your drum module’s own kit when you hit a pad.
Your module plays your hits with no delay. Beat Studio plays the pattern’s drums, the backing track and the click. Both have to reach the same headphones, so something has to mix them together.
Before you start, open the Beat Studio mixer and click M on the My Drums channel to mute your own hits, so only the module plays them. The mixer is in the training view’s Studio mode. The default Focus mode doesn’t show it.
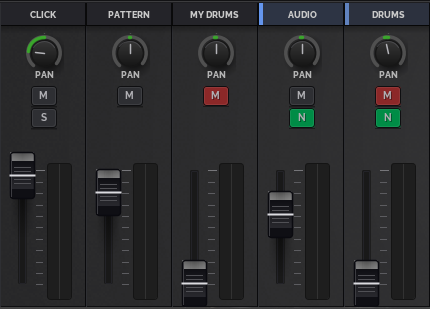
Only one thing should make a sound when you hit a pad. If every hit sounds doubled, flammed or echoed, Beat Studio is playing it too, so mute your own hits in the mixer. The pattern’s drums are different: they’re the part you play along to, and you set their level in the mixer.
Without an audio interface
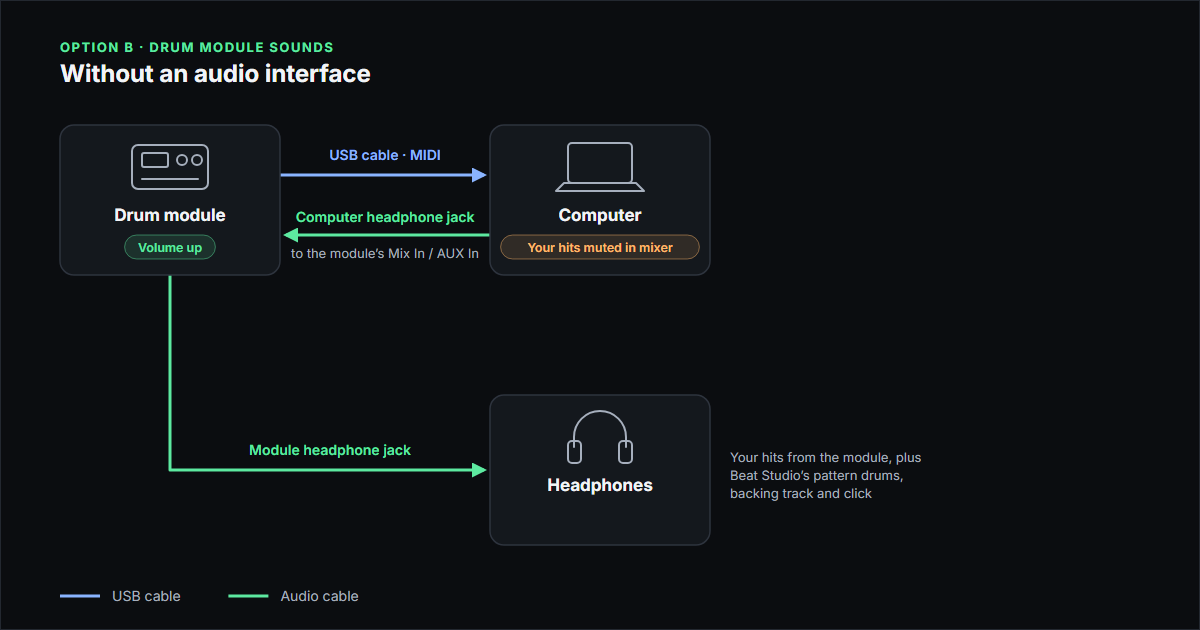
The module does the mixing:
- Drum module → USB cable → computer (MIDI)
- Computer headphone jack → audio cable → module’s Mix In or AUX In
- Module’s headphone jack → your headphones
In Step 4, choose your computer’s headphone output as the output device, since that’s what feeds the module. Balance the backing track against your drums with the module’s Mix In level or your computer’s volume. Check your module’s manual for the name of the input and the cable it takes.
With an audio interface
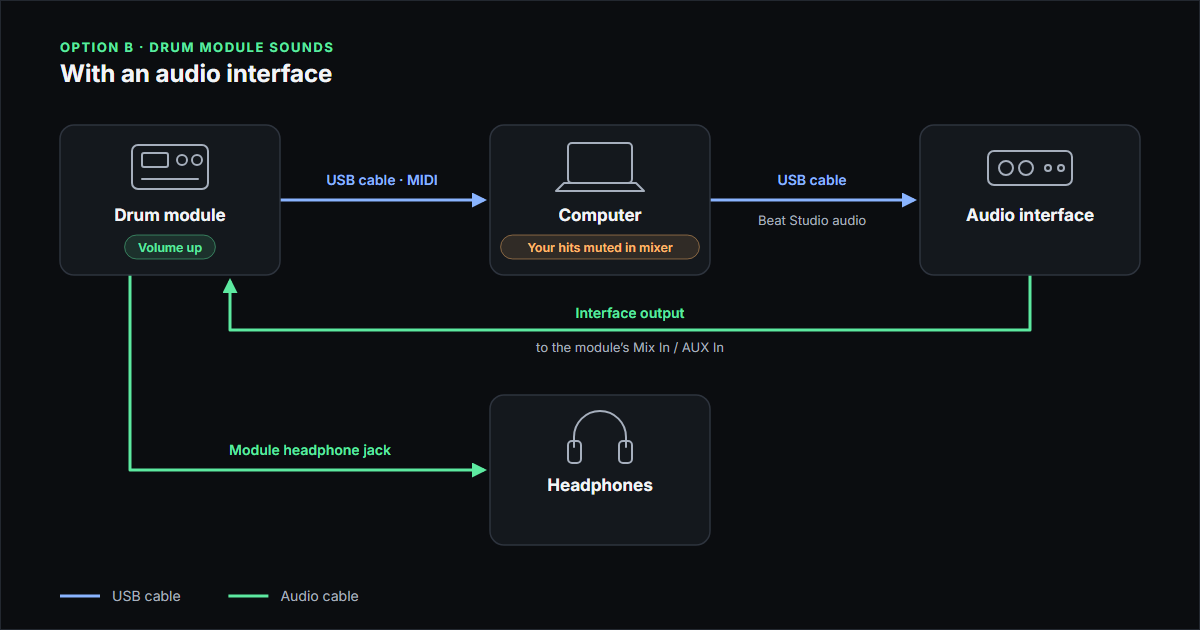
The module still does the mixing. The interface just replaces the computer’s headphone jack:
- Drum module → USB cable → computer (MIDI)
- Computer → USB cable → audio interface (Beat Studio audio)
- Interface output → audio cable → module’s Mix In or AUX In
- Module’s headphone jack → your headphones
In Step 4, choose the interface as the output device. Balance the backing track against your drums with the module’s Mix In level or the interface’s output volume.
Good to know
The pattern’s drums come from Beat Studio’s kit, so they can sound different from your module’s kit. If that’s distracting while you play along, turn them down in the mixer.
Other setups
These two setups are the basic ones, and they work with almost any kit. Many drum modules and audio interfaces can do more: some modules work as a USB audio interface themselves, and many interfaces and mixers can route the module’s audio and the computer’s audio in other ways. Those setups can work well too, but they depend on your gear, so check its manual. Whatever you build, the same rule applies: only one thing should make a sound when you hit a pad.
Next step
Your cables are done. Go back to the first setup tutorial and check that Beat Studio sees your kit. If you’d rather hear Beat Studio’s kit, see the Beat Studio sounds wiring guide.